Most of the time, I come across enticing recipes on Pinterest or blogs to recreate. This has left my favorite recipes scattered across my computer, print-outs stuffed in containers throughout my kitchen and email drafts saved. Wouldn’t it be nice if they were in one, easy-to-grab location? It also would be nice if it looked pretty awesome too! Goodwill gave me that answer in the form of a slightly beat-up recipe box.
Materials Needed:
- old recipe box or wood box
- your recipe collection
- index cards (size that fits in your recipe box)
- acrylic paint
- paint brush
- Thickers or sticker letters
- glitter
Step 1:
You can find recipes boxes to use at thrifts stores or wood boxes at craft stores.
Prep your recipe box to paint. I decided to paint mine two different colors (top part bright green, bottom part tan). I tested the paint on the inside to make sure it would work with the box material.
 |
| love my laminator |
Paint your box and while it’s drying, prepare your recipe cards. I printed my recipes on 3x5 index cards that fit inside my recipe box. Since I have a laminator, I decided to laminate all my recipe cards (you can also visit any major office store or Kinkos to get yours laminated too!).
 |
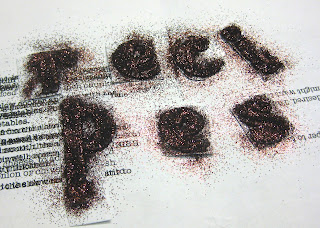
Any excuse to play with glitter
|
Take the Thickers (sticker letters) and cut out the letters you want to use. Peel off the top layer to expose the sticky top. Sprinkle with glitter of your choice (probably the best part here). Shake off excess glitter.
Step 4:
Apply a second coat of paint if needed. Once it’s dry, attach the Thickers to the outside of your box. Voila! Ready for your next cooking adventure.
If you're an Etsy seller in the San Francisco Bay Area, contact Our Team Captain about joining SFEtsy!


2 comments:
love it -- old school made new! for a while now i've had a thrifted wooden recipe box that i've been wanting to fancy up for exactly this purpose. thanks for the ideas!
Thanks, Jen! Let me know how it turns out
Post a Comment