Showing posts with label pumpkin. Show all posts

Tuesday, October 16, 2012

Tuestorial: Pumpkin Bread

Warning: Once you make this recipe and share with your friends and family, they will demand you continue to make it (Fall or not)! This recipe couldn’t be easier. Substituting butter for olive oil makes this bread very moist and brings out the flavor of the spices. Enjoy!
(recipe adapted from Simply Recipes)

Baking time is on!

Ingredients:

  • 1 cup whole wheat flour, ½ cup white flour
  • ½ teaspoon of salt
  • 3/4 cup sugar
  • 1 teaspoon baking soda
  • 1 15 oz can of pumpkin puree
  • ½ cup olive oil
  • 2 eggs
  • ¼ cup water
  • ½ teaspoon nutmeg
  • 1 teaspoon cinnamon
  • ½ teaspoon allspice
  • ¼ cup flax seed (optional)
  • handful of chopped walnuts (optional)

Bonus recipe, Cream Cheese Frosting (recipe as “Step 4”):


  • ½ cup of butter (1 stick), room temperature
  • 8 oz of cream cheese, room temperature
  • 2 - 3 cups of powdered sugar
  • 1 teaspoon of vanilla extract

Dry + wet =  perfect pumpkin bread!
Step 1:

Preheat oven to 350°F and spray or butter 9x5x3 inch loaf pan. Sift together the flour, salt, sugar, and baking soda in a large bowl.

Step 2:

Mix the pumpkin, oil, eggs, water, and spices together in a mixer, then combine with the dry ingredients. Add dry ingredients in three parts to ensure it mixes well. 

Ready for the oven!
Step 3:

Pour batter into loaf pan. Add walnuts to top of batter (optional). Bake 50-60 minutes until a knife poked in the very center of the loaf comes out clean. Turn out of the pan and let cool on a rack.
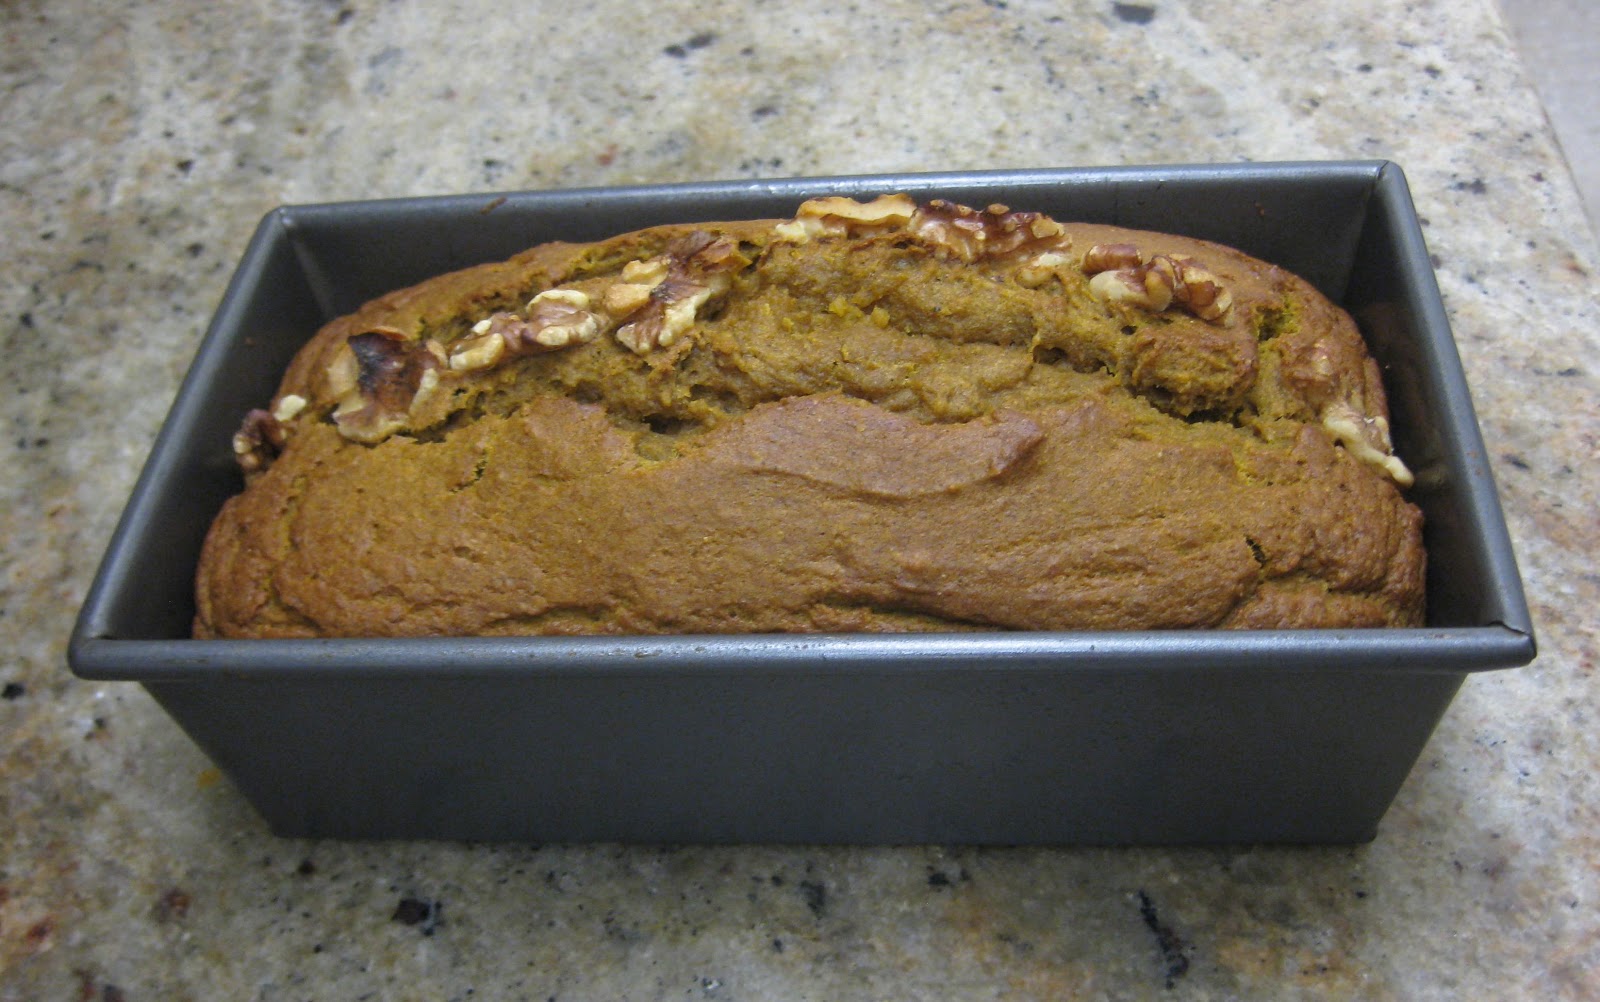
Yum!
Step 4 (bonus!):

To make cream cheese frosting, mix the butter and cream cheese together. Add the vanilla extract and mix. Add the powdered sugar until it tastes perfect! Spread on top of cooled pumpkin bread and serve.


If you're an Etsy seller in the San Francisco Bay Area, contact Katy or Steph about joining SFEtsy!

Tuesday, October 2, 2012

Tuestorials: Fabric Pumpkins

Everyone has their thing, their obsession, their “jam” as I like to say. In terms of crafts, my jam is fabric pumpkins. This (almost) no-sew project gets me in a festive Fall mood and, for the last two years, I’ve hosted craft parties around it to show friends how to make them. My love for them could not be contained within me, it had to be shared. Today, I present my jam and I hope it gets you as excited about Fall as I am!


When the clock strikes midnight, they will turn into a pumpkin!
Materials
  • stuffing (can also use many plastic bags)
  • scrap fabric in fall colors and patterns (fabric measurements depending on the size you want     your pumpkin. Almost any size well work so use what you got!)
  • small scrap fabric, ribbon, glitter, etc. for establishments
  • twine or thick string
  • scissors
  • fabric glue or hot glue gun
  • rubber band
Any old fabric about to be turned into Fall magic
Step 1:

For a standard sized pumpkin, take a piece of 10" by 7" fabric and sew the two ends together (do not cut in two separate pieces). It should look like a sleeve when done. In fact, you can use a sleeve of an old sweater or flannel shirt for this project. The possibilities are endless. For a no-sew option, you can glue the two ends together. Wait for glue to dry to proceed to the next step.


Inside Out
Right Side or Pumpkin Bottom!
Step 2:

Turn fabric inside out and tie a rubber band to one end. Turn fabric right side and the bottom will look like the bottom of a pumpkin (one step closer!). Stuff slowly, careful to not undo the rubber band.


Stuffed and ready to be tied together!
Step 3:

Once your pumpkin has taken shape, take the twine and wrap the top, leaving extra material on top. This will create your pumpkin stem. Tie the “stem” a couple of times (to ensure your pumpkin is closed tightly) and loop around the sides of your pumpkin (circle around stem then down one side, then back up again to the stem). This will help form your pumpkin’s shape and look like the seams of a standard pumpkin. Once you are done with the sides, loop around the extra top fabric several more times to finish the stem. Cut and tie off twine.


Bling, Bling
Step 4:

Now for the sparkle and shine! Take your small pieces of scrap fabric and add leaves, stem curls, anything festive to your pumpkin! Any type of fabric glue or a hot glue gun will work.


Ready to party until the Holidays!

If you're an Etsy seller in the San Francisco Bay Area, contact Katy or Steph about joining SFEtsy!

Tuesday, November 8, 2011

Tuestorial: Pumpkin-Crazed Snickerdoodles


On Saturday I was driving through West Marin in search for apples and there were all these sad little pumpkins abandoned in pumpkin patch fields. I asked my friend - "So, do they just leave them there to die after Halloween? Think of all the yummy stuff one could make with that!" I believe that's when I became Pumpkin-Crazed...this happens for most people when Starbucks comes out with their seasonal pumpkin spiced latte...but not me... it took seeing abandoned pumpkins to get my mind thinking about how to use them in my baking.

The next day, I made Pumpkin Biscotti. But the recipe I found online only asked for 1/2 a cup of pumpkin...and there I was with another cup to use up because a can of pumpkin is actually a cup and a half. Whoopsie - guess I gotta make more pumpkin treats - oh darn.
I guess I could have put it to good use inside a soup or something - but Pumpkin Snickerdoodles just sounded just a tad-bit more delicious.

Also - with our winter team show coming up - you can make some of these wonderful delights for the table and impress me...since I'll be there volunteering at the baked goods table.

I modified this recipe to make my version healthier, more moist and also more pumpkin-y.

For the cookies:
3¾ cups Red Mill Wheat Flour
1½ tsp. baking powder
½ tsp. salt
1 tsp. Trader Joe's Pumpkin Pie Spice
1 cup unsalted Straus Family Creamery butter, at room temperature
1 cup granulated organic cane sugar
½ cup organic (light or dark) brown sugar
1 cup pumpkin puree
1 large egg
2 tsp. Madagascar Vanilla Paste


For the coating:

1 cup organic granulated can sugar
2 1/2 tsp. Trader Joe's Pumpkin Pie Spice

Step one:
Combine wet ingredients... then put in all the dry ones. Usually I skip this step...but this is important here for these cookies since you'll want to make sure they stay fluffy - and this will help.

Step Two:
Chill your dough for an hour in the fridge. Why? Because you want to make sure your butter becomes firm again and your cookies hold their shape during baking. When you are mixing the ingredients together...the butter looses some of it's binding ability. Putting the dough in the fridge will bring the dough back together and make rolling your dough easier later down the line.

Step Three:
Pre-heat oven to 350 degrees - line your cookie sheet with a cookie sheet liner OR parchment paper. This is so the sugar coating doesn't stick to the cookie sheet. If you use a cookie sheet liner, not only will you be able to get your cookies off the sheet easily, you will also end up with a perfectly-perfect cookie bottom and your cookies won't dry out as much as they would if they were placed directly on the sheet.

Step Four:
Make your dough into 2 tablespoon sized balls. Coat your little nuggets in the sugar & spice mixture. Place them 2 inches apart on the cookie sheet. Take the back of a spoon and lightly smoosh your cookie down (smoosh is a technical term for pushing down lightly). This will help them cook all the way through and also gives a nice "thumbprint" look to them.

Step Five:
Bake for 13-15 minutes each batch - let cool for 5 minutes before transferring your cookies onto a wire rack. Repeat until all the dough is gone. This recipe makes a boat-load of cookies - up to 6 dozen since I increased the amount of pumpkin. Which is why they would be perfect for a craft event - since you can help feed lots of customers who come to shop at our show.

Side Note:
About the Trader Joe's Pumpkin Pie Spice...
it's a combo of Cinnamon, Allspice, Nutmeg, Lemon Peel and Ginger - which is why I LOVE this stuff...it gives a great flavor to most all things that ask for Cinnamon and Nutmeg...and takes up much less room in your cupboard for those of us who want to save our pantry space for more art supplies. ;-)


If you're an Etsy seller in the San Francisco Bay Area, contact Jen from Mama's Magic Studio about joining SFEtsy!

Tuesday, October 26, 2010

punkin' carvin'!


OoooOOOoooOoohhh!

The best part of Halloween is definitely dressing up. Period. Sometimes I know what I’ll be masquerading as about a month or two in advance. But, the one thing that is almost as fun, and brings people together for an oddly satisfying ritual, is pumpkin carving. There's something about the mixture of nature, art, and crisp cool night air that really gets folks into a holiday spirit.
Now, I know we’ve all done this for ages, but who doesn’t like a motivating refresher? And, maybe you’ll learn a new technique or find inspiration for your next little orange victim!

Let’s carve!


You need:

pumpkin(s)
sharp, serrated knives (thick for large ares, skinny for narrow areas)
pumpkin hole punchers (they really help to get things started!)
metal spoons or ice creams scoops
a couple of bowls (depending on how many pumpkins you’ll be gutting!)
markers (dry erase, if possible)
paper (if you need to sketch out some ideas)
table cover
votive candles and matches (with adult supervision!)
**cookies and treats
**friends

**optional, but make the experience more magical.


1) Make sure you’ve covered the table or whatever area you’ll be working on. Lay out your essentials.

2) Sketch out an idea on paper if you’re a Nervous Nelly like me.

3) Draw your design on the pumpkin.
**Look around for inspiration. Never know when it might strike!**

4) Insert a wide serrated knife at an angle to carve a lid that will sit nicely and not fall into the pumpkin.

5) Carve all the way around in a circle, then gently wiggle the lid loose.

6) Scoop out the seeds. In one bowl, discard the pumkin seeds. In another bowl, discard pumpkin flesh chunks.
**Set aside the seeds for roasting!** ** If you're feeling extra ambitious, and you've used baking pumpkins, save the clean chunks for pie, or muffins, or beer!**

7) Start carving out your design. (*Don't be discouraged if some folks finish before you do :) *)

Use appropriate sized knives depending on the carving area size.

8) Carve slowly and carefully. You don't want to loose an eye...or a tooth! If your design lines meet close together, be sure your knife doesn't angle too much causing the flesh to lose stability.

9) Bring your creation outside to the porch. Light a candle and carefully place inside the pumpkin and replace the lid.

10) Marvel in your awesomeness!


Happy Halloween! Have fun and be safe!

-ash


If you're an Etsy seller in the San Francisco Bay Area, contact Jen from Mama's Magic Studio about joining SFEtsy!
Related Posts Plugin for WordPress, Blogger...