Showing posts with label recipe. Show all posts

Tuesday, May 28, 2013

Tuestorial: Strawberry Shortcake Muffins

Strawberry season is finally here! I'm not sure about you, but I love it. I was inspired to make this easy and healthy muffin recipe for a quick breakfast in the morning or an afternoon pick-me-up with tea. Enjoy!


Materials Needed:
  • 2 1/2 cups old fashioned oats
  • 1 cup plain Greek yogurt (low fat)
  • 2 eggs
  • 3/4 sugar (can use an artificial sweetener of your choice)
  • 1 1/2 tsp of baking powder
  • 1/2 baking soda
  • 1 1/2 cups strawberries (chopped)
  • Optional: flax seed or protein powder
  • Blender or food processor
  • Muffin tin
  • 12 cupcake liners 
Recipe adapted from www.christawaldrop.blogspot.com

Step 1:

Preheat the oven to 400 degrees. Gather your ingredients and line your muffin tin with cupcake liners. I would spray the liners with some cooking spray as this batter tends to stick!

Pre-blend...
Post-blend!
Step 2:

Put all ingredients except the strawberries in a food processors or blender. Blend until oats are smooth. A food processor does this in about 5 seconds! 

Ready to get toasty
Step 3:

Keep a 1/2 cup of strawberries on reserve and fold the rest into the batter. Spoon batter into muffin tins. Add reserve of strawberries to the tops of each muffin.


Step 4:

Bake for 22-25 minutes then enjoy! Make it a fancy treat with a balsamic glaze on top, butter, or whipped cream.


If you're an Etsy seller in the San Francisco Bay Area, contact Our Team Captain about joining SFEtsy!

Tuesday, October 16, 2012

Tuestorial: Pumpkin Bread

Warning: Once you make this recipe and share with your friends and family, they will demand you continue to make it (Fall or not)! This recipe couldn’t be easier. Substituting butter for olive oil makes this bread very moist and brings out the flavor of the spices. Enjoy!
(recipe adapted from Simply Recipes)

Baking time is on!

Ingredients:

  • 1 cup whole wheat flour, ½ cup white flour
  • ½ teaspoon of salt
  • 3/4 cup sugar
  • 1 teaspoon baking soda
  • 1 15 oz can of pumpkin puree
  • ½ cup olive oil
  • 2 eggs
  • ¼ cup water
  • ½ teaspoon nutmeg
  • 1 teaspoon cinnamon
  • ½ teaspoon allspice
  • ¼ cup flax seed (optional)
  • handful of chopped walnuts (optional)

Bonus recipe, Cream Cheese Frosting (recipe as “Step 4”):


  • ½ cup of butter (1 stick), room temperature
  • 8 oz of cream cheese, room temperature
  • 2 - 3 cups of powdered sugar
  • 1 teaspoon of vanilla extract

Dry + wet =  perfect pumpkin bread!
Step 1:

Preheat oven to 350°F and spray or butter 9x5x3 inch loaf pan. Sift together the flour, salt, sugar, and baking soda in a large bowl.

Step 2:

Mix the pumpkin, oil, eggs, water, and spices together in a mixer, then combine with the dry ingredients. Add dry ingredients in three parts to ensure it mixes well. 

Ready for the oven!
Step 3:

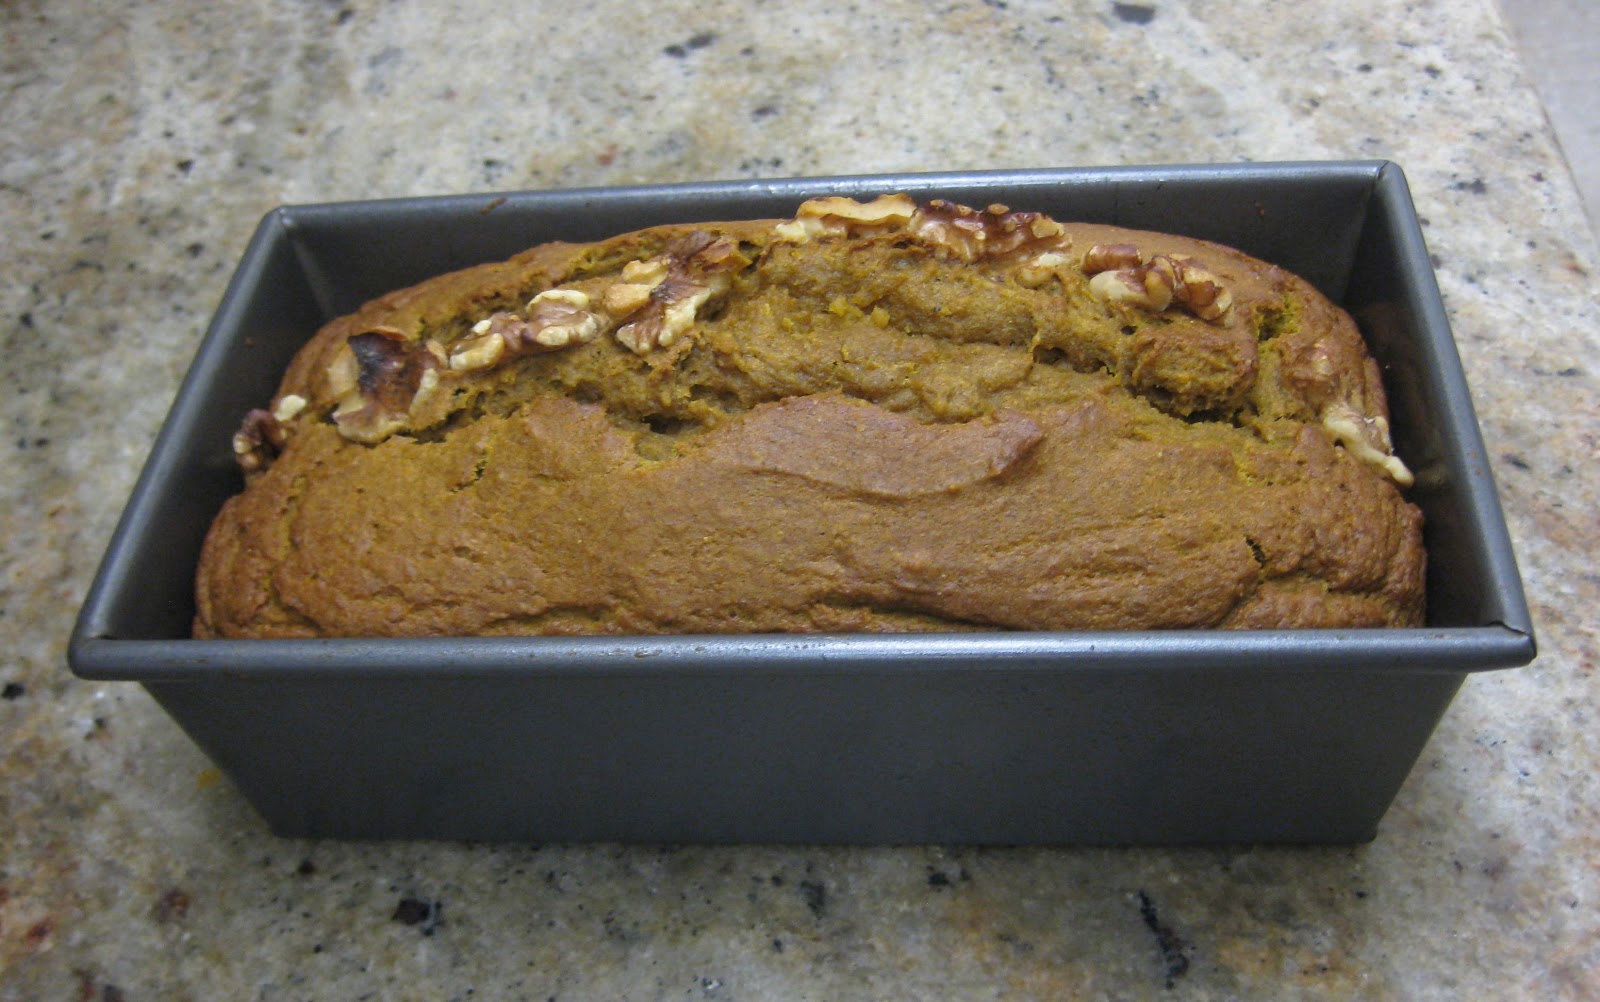
Pour batter into loaf pan. Add walnuts to top of batter (optional). Bake 50-60 minutes until a knife poked in the very center of the loaf comes out clean. Turn out of the pan and let cool on a rack.

Yum!
Step 4 (bonus!):

To make cream cheese frosting, mix the butter and cream cheese together. Add the vanilla extract and mix. Add the powdered sugar until it tastes perfect! Spread on top of cooled pumpkin bread and serve.


If you're an Etsy seller in the San Francisco Bay Area, contact Katy or Steph about joining SFEtsy!

Tuesday, November 8, 2011

Tuestorial: Pumpkin-Crazed Snickerdoodles


On Saturday I was driving through West Marin in search for apples and there were all these sad little pumpkins abandoned in pumpkin patch fields. I asked my friend - "So, do they just leave them there to die after Halloween? Think of all the yummy stuff one could make with that!" I believe that's when I became Pumpkin-Crazed...this happens for most people when Starbucks comes out with their seasonal pumpkin spiced latte...but not me... it took seeing abandoned pumpkins to get my mind thinking about how to use them in my baking.

The next day, I made Pumpkin Biscotti. But the recipe I found online only asked for 1/2 a cup of pumpkin...and there I was with another cup to use up because a can of pumpkin is actually a cup and a half. Whoopsie - guess I gotta make more pumpkin treats - oh darn.
I guess I could have put it to good use inside a soup or something - but Pumpkin Snickerdoodles just sounded just a tad-bit more delicious.

Also - with our winter team show coming up - you can make some of these wonderful delights for the table and impress me...since I'll be there volunteering at the baked goods table.

I modified this recipe to make my version healthier, more moist and also more pumpkin-y.

For the cookies:
3¾ cups Red Mill Wheat Flour
1½ tsp. baking powder
½ tsp. salt
1 tsp. Trader Joe's Pumpkin Pie Spice
1 cup unsalted Straus Family Creamery butter, at room temperature
1 cup granulated organic cane sugar
½ cup organic (light or dark) brown sugar
1 cup pumpkin puree
1 large egg
2 tsp. Madagascar Vanilla Paste


For the coating:

1 cup organic granulated can sugar
2 1/2 tsp. Trader Joe's Pumpkin Pie Spice

Step one:
Combine wet ingredients... then put in all the dry ones. Usually I skip this step...but this is important here for these cookies since you'll want to make sure they stay fluffy - and this will help.

Step Two:
Chill your dough for an hour in the fridge. Why? Because you want to make sure your butter becomes firm again and your cookies hold their shape during baking. When you are mixing the ingredients together...the butter looses some of it's binding ability. Putting the dough in the fridge will bring the dough back together and make rolling your dough easier later down the line.

Step Three:
Pre-heat oven to 350 degrees - line your cookie sheet with a cookie sheet liner OR parchment paper. This is so the sugar coating doesn't stick to the cookie sheet. If you use a cookie sheet liner, not only will you be able to get your cookies off the sheet easily, you will also end up with a perfectly-perfect cookie bottom and your cookies won't dry out as much as they would if they were placed directly on the sheet.

Step Four:
Make your dough into 2 tablespoon sized balls. Coat your little nuggets in the sugar & spice mixture. Place them 2 inches apart on the cookie sheet. Take the back of a spoon and lightly smoosh your cookie down (smoosh is a technical term for pushing down lightly). This will help them cook all the way through and also gives a nice "thumbprint" look to them.

Step Five:
Bake for 13-15 minutes each batch - let cool for 5 minutes before transferring your cookies onto a wire rack. Repeat until all the dough is gone. This recipe makes a boat-load of cookies - up to 6 dozen since I increased the amount of pumpkin. Which is why they would be perfect for a craft event - since you can help feed lots of customers who come to shop at our show.

Side Note:
About the Trader Joe's Pumpkin Pie Spice...
it's a combo of Cinnamon, Allspice, Nutmeg, Lemon Peel and Ginger - which is why I LOVE this stuff...it gives a great flavor to most all things that ask for Cinnamon and Nutmeg...and takes up much less room in your cupboard for those of us who want to save our pantry space for more art supplies. ;-)


If you're an Etsy seller in the San Francisco Bay Area, contact Jen from Mama's Magic Studio about joining SFEtsy!

Tuesday, July 19, 2011

Tuestorial - Easy Refrigerator Pickles!


With all of the farmers markets out there just overflowing with amazing ingredients this summer & no doubt some of you have gardens that are overflowing...let's talk about pickling!

As you all know by now...I just love taking a bit of my weekend and channeling it into cooking and baking. About a month ago, I was talking to someone about pickling and she brought me a HUGE HUGE BOOK about pickling to read all about the different ways of pickling... so, like I said...that was a month ago. This book is HUGE... huge I tell you...I've been reading all about different techniques and then trying to figure out which of the zillion recipes to use... it's been a bit overwhelming.

Well, last weekend I decided...it's time. It's time for me to just dive in. So I posted a notice on my Facebook page... asking if anyone wanted to come over and pickle with me. Everyone seemed excited for me, but no one wanted to come over. However! My friend sent me her easy refrigerator recipe and it was so non-intimidating that I just thought to my self - self, why didn't you ask your friends for a simple recipe to start with?!
I mean... the recipe is so so so easy that I really would have saved myself a lot of time just putting a little word out there to friends first.

RECIPE:
Refrigerator Dill Pickles

5-7 lemon Cucumbers
3 LARGE cloves Garlic
one bunch of Dill
One spring or two of Thyme
1 tablespoon sea salt
One beet sliced thin
1/2 c red raspberry vinegar (I used fresh raspberries here instead)
3tblsp sugar
2 cups apple cider or white vinegar (I split my vinegar between the two and increased to 2.5 cups since I didn't have Raspberry Vinegar)
1/2 of a HOTtatah pepper

And water to taste

let sit three days in fridge in pint size mason jars.

OTHER TIPS:
- be sure you use cucumbers that are labeled for pickling...this will help them have that "snap" when you bite into them.

- These pickles will keep in the fridge for about a month. But... they are so tasty...they will be gone well before that.

- I didn't use mason jars, since it was much easier for me to just put all of the ingredients in one large jar first and then portion it out later once I got the flavor right.

- Also, I used red beets which did, as you can see, turn my pickles pink... I don't think this is at all a bad thing...but if you wanted, I'm sure you could use some golden beets and side track the whole color "issue".


The next thing I'm going to tackle is canning! :-) I want to go to a fresh fruit stand and get a case of peaches. I know it's labor intensive...but to have canned peaches in the middle of winter will be such the treat! Any recipes out there?... best ask now before I start reading a 600 page book on canning. ha ha


If you're an Etsy seller in the San Francisco Bay Area, contact Jen from Mama's Magic Studio about joining SFEtsy!

Tuesday, June 14, 2011

Tuestorial - Lentil-Power Cookies


Image these little cookies with a cape...flying into the air screaming... LENTIL Poooower! Whether you eat one as an afternoon snack or even for breakfast...these cookies pack a powerful WHAM-BAM 1-2 PUNCH!
They have dried fruit in them...along with protein packed lentils, almonds and dark chocolate that will keep you going all day long.

Recipe and Ingredients:

2 cups Whole Wheat Flour
1/2 tsp. pumpkin spice
1/2 tsp. salt
1/2 tsp. baking powder
2 sticks butter
3 cups oats
2 eggs
1 cup cane sugar
1 cup light brown sugar
1/2 cup cooked/cooled red lentils (if you chose to omit the lentils, flour is lowered to 1 1/2 cups)

(the following is optional and to your liking...just a mix of dried fruits, nuts and chocolate to add to your cookies)
handful of chopped mango
handful of chopped apricots
handful of sunflower seeds
handful of dried blueberries
handful of dried cranberries
handful of dried cherries
1/2 cup raw sliced almonds
2 T flax seeds


2 fancy bars of dark chocolate, or milk chocolate if desired...chopped into random sized chunks.

Pre-heat oven to 325 degrees

Use a soup spoon to scoop the batter onto your cookie sheet.
Bake for approx. 20 minutes each batch in the middle of the oven.
the cookies should be golden brown on the edges.
Let them cool for a couple minutes on the pan before transferring them to a cooling rack.

Because this recipe will make up to 4 dozen cookies...be sure to remember that not all of them have to be eaten all at once. I keep several of them in my freezer and put a couple each day in my lunch box for that extra little LENTIL-POWER when I need it at work.

I won't lie...they are kinda like little kitchen sink cookies that have a little bit of everything. I imagine...if you were a vegan...these would be just as delicious with egg substitute since they are NON-DAIRY!

Like all my recipes... there's no need to separate ingredients or to make anything another other than a total mess in your kitchen while using your hands and getting down and dirty when mixing these up.

Enjoy!
I have never EVER shared this recipe with anyone before...but, at least in my little SF community, these are the cookies that people ask for...and more than once...I've been asked for the recipe...soooo...here you go, SF Etsy... from my kitchen, to yours. Because, I think you're pretty special.


If you're an Etsy seller in the San Francisco Bay Area, contact Jen from Mama's Magic Studio about joining SFEtsy!

Tuesday, May 10, 2011

"Famous" FLAX n FIG Nutty Banana Bread Recipe!


MY "FAMOUS" FLAX n FIG BANANA BREAD!

One of the running jokes in my family is that my Banana Bread is famous. "Famous" because in 2005, during a private event for the launch of Current TV, Al Gore thanked me for allowing my boyfriend at the time to work long hours for Current while they set up the site for launch...and my response?! "It's totally OK, I make him Banana Bread"....Clearly confused as to what the heck I was talking about...Al Gore asked me to repeat what I just had said...
so I said,"uhhh...Banana Bread?". My boyfriend was mortified and quickly pushed me out of the way.
I have yet to live down that moment with my Dad...he looooves reminding me of that story. But the best part of all is that now I can kinda-sorta call my Banana Bread recipe "famous",

My banana bread is a very basic recipe that has been modified over the years to include lots of crazy extra ingredients. It's basically Kitchen-Sink bread...with bananas and whatever I feel like adding in.

Since I'm feelin' a little "NUTTY" today...I decided to make a Nutty, Fig-Y, Flax-Y Banana-Y Bread and here's how you can make yours, too! This particular combination is YUMMY!

STEP ONE!
Materials!
For this, you just need a standard bread pan (8 1/2 x 4 1/2 x 2 1/2), a large mixing bowl, measuring cups & measuring spoons.
(and something to mix with if you prefer)

STEP TWO!
Pre-heat the oven!

Just set your oven at 350 degrees.

STEP THREE!
The Recipe!

Here's my (modified) Banana Bread recipe.
Check the comments for the regular old "famous" Banana Bread.

1 1/2 cup Whole Wheat Flour
1 cup Flax Seed Flour (can just use Whole Wheat Flour if you don't have this)
1 cup Cane Sugar
3 1/2 tsp. baking powder
3/4 Almond Milk (or regular milk)
2-3 frozen bananas (thawed)*
1 tsp. salt
3 tablespoons oil
1 egg
1 cup sliced raw almonds
6-7 finely chopped dried figs

*NOTE: Frozen Banana?! yes. I learned on Good Eats that if you freeze your bananas after they go brown, and then re-introduce them after they thaw into banana bread (microwave until not rock solid frozen), this allows the banana flavor to get into the WHOLE loaf... it's true. But you can still use regular ones...just won't be as tasty.

STEP FOUR!
Combine!

I admit it - I'm one of the laziest bakers you will ever meet. I just combine ALL of the ingredients at the same time and then just stir with my hands - Free Handed. I know I know... the riiiight way to do it would be to combine the dry ingredients and THEN add in your wet...then stir all of them together...with a spoon. However you want to do it is really just fine for this recipe. Just make sure all the ingredients are combined.

STEP FIVE!
Prepare the baking Pan!

You want to spray your pan with oil. I use a Canola Oil... Olive Oil Spray tastes a bit funky to me. Using softened butter on a towel will also work...just smear that butter on all of the corners, sides and bottom of the pan to make sure you can get your bread out once it's finished baking.

STEP SIX!
Bake your Famous Bread!

Dump your awesome mixture into your pan...make sure you spread out the batter so that it's even in the pan...
and then just pop that puppy in the oven at 350 degrees for 55-60 minutes.
You should be able to put a toothpick (of knife, as I do...cause my house isn't THAT prepared) in the center without any wet dough on the end of your tool....at that point, it will be finished! YAY!

Let it cool and YUM! Eat it and tell everyone Al Gore knows all about this bread and is a fan. I mean...we don't KNOW that he's a fan of it...but I'm pretty sure he tells people about how hilarious it was when that girl in 2005 made a fool of herself and talked about Banana Bread. I must add though...he did give me a wet kiss on the cheek at the end of the evening...so, yeah...he's a fan. :-)

Additionally!
As a Do-It-Yourself-er, I find the it's a bit hard on my budget and my heart to always go out and buy myself some breakfast on the way to work. Once a week I tackle a bread recipe and cut up slices for myself and friends for upcoming breakfasts at work...or I'll make some delicious muffins and have one for breakfast...and one for snack later in the day...
Do you know how much money I saved last month?! Over $200!!! Would have been more if I wasn't such a sucker for croissants. Every time I make something, I feel pretty crafty...
and going forward, I'll try to share a few more of my "Katy Crocker" Recipes with you!


If you're an Etsy seller in the San Francisco Bay Area, contact Jen from Mama's Magic Studio about joining SFEtsy!
Related Posts Plugin for WordPress, Blogger...