Showing posts with label fall. Show all posts

Tuesday, October 21, 2014

Tuestorial: Candy Corn Vase

Tuestorial: Candy Corn Vase

I can't believe it, but Halloween is almost here! There are many craft-inspiration ideas for this time of year, but I thought I would be inspired by my favorite seasonal candy...the humble candy corn. Some love it, some hate it (we aren't friends), but you can enjoy it in this unique form with most items you probably already have around your house.


Materials Needed:
  • Empty wine bottle (easy find in my house)
  • White paint (acrylic or glass friendly)
  • Yellow paint
  • Orange paint
  • Paint brush
  • Painter's tape

Step 1:

Clean your empty wine bottle of any labels or dirt. You want a pretty surface before you start painting. Once it's clean and dry, apply at least two coats of white paint to the entire bottle. This will provide a good base for the other colors too.


Step 2:

Once the white paint is dry, mark the section for yellow with painter's tape. The edges don't need to be neat (should be uneven to look more like candy corn), but this makes it easier when painting. Start with yellow at the bottom!


Step 3:


Once the yellow section is dry, remove the painter's tape and mark off the top (just below the neck of the bottle) for the orange section and go to town. See how delicious it is looking?


Step 4:

Once the orange section is dry, just remove the painter's tape and you are done! You can go back to make the other edges less neat or touch-up any boo-boos (technical term). Put it on display for all your trick-or-treaters! 


If you're an Etsy seller in the San Francisco Bay Area, visit Our Team Page about joining SFEtsy!

Monday, October 13, 2014

Immerse Yourself in the Season

Fall marks a unique time of the year when so much is beginning to change. As opposed to spring which revives us from the sleep of winter with the blossoms of summer's fruits, fall comes silencing the flirty abundance, leaving us in an awkward relationship with the introverted and coy squash, roots and tubers. There is beauty here among the earthy tones and flavors. Seeing it is just a matter of immersing ourselves in the season.


When I was younger, a chef I worked for took me under his wing, offering his wisdom. Wisdom shown in bouts of rage. He really did try to impart so much knowledge. He was always yelling at me. As the season's change approached, I would prepare to rewrite my portion of the menu to the tune of him marching around the kitchen before each shift demanding, "grind yourselves in the season!" At a time when seasonal, organic and farm to table fare was still climbing out of the dark ages, he was guiding me into the natural gifts of the seasons. It took me some time to become fully open to this simple concept, which would ultimately set me free. Immerse yourself in the season.

As a chef who currently works with small farmers and farmer's markets it is quite simple for me to follow the seasons as I create my preserves and ferments. Hey, if it's not coming out of the ground or off of a tree I can't use it. However, with my other creative pursuits I still use the seasons to get an inspirational charge. "Art imitating life" is not a new concept and I know many of you out there draw upon your experiences and surroundings to feed your creativity. This is a great process but one which we can overlook.

Pomegranates bursting when ripe remind me of hidden jewels.
As with finding inspiration for being creative during the colder and sometimes drab months we call the fall and winter, as a shop owner it is imperative to find the motivation and follow the natural trends of the changes in seasons to update our crafts, listings, and possibly, shop. Changing tags to encourage search results for the season and upcoming holidays is a good idea, as is placing items suitable for the time of year in your 'featured items' slot.

The holidays will begin to fill up the space in-between the autumn days, bringing about events, plans, commitments, and family gatherings, adding much joy along with stress. The demand of orders for your items will hopefully begin to increase as well, leaving you with a lot to accomplish: baste turkey, pack orders, mash rutabaga, pinch nose, mail packages, chat with aunt Marge. Still many of you will also be taking your shops and wares out to various locations in the Bay Area, ever increasing the demand on your time and energy. In the midst of all of the festive chaos, DO NOT let all of the hustle and bustle of the holidays interfere with the opportunity for you to get out into the world and experience what the season has to show you.

Natural patinas, color contrasts and textures. Autumn brings
so much inspiration to be enjoyed.

Submitted by Klee Wiles-Pearson of Entropy the Shop.


If you're an Etsy seller in the San Francisco Bay Area, visit Our Team Page about joining SFEtsy!

Tuesday, October 16, 2012

Tuestorial: Pumpkin Bread

Warning: Once you make this recipe and share with your friends and family, they will demand you continue to make it (Fall or not)! This recipe couldn’t be easier. Substituting butter for olive oil makes this bread very moist and brings out the flavor of the spices. Enjoy!
(recipe adapted from Simply Recipes)

Baking time is on!

Ingredients:

  • 1 cup whole wheat flour, ½ cup white flour
  • ½ teaspoon of salt
  • 3/4 cup sugar
  • 1 teaspoon baking soda
  • 1 15 oz can of pumpkin puree
  • ½ cup olive oil
  • 2 eggs
  • ¼ cup water
  • ½ teaspoon nutmeg
  • 1 teaspoon cinnamon
  • ½ teaspoon allspice
  • ¼ cup flax seed (optional)
  • handful of chopped walnuts (optional)

Bonus recipe, Cream Cheese Frosting (recipe as “Step 4”):


  • ½ cup of butter (1 stick), room temperature
  • 8 oz of cream cheese, room temperature
  • 2 - 3 cups of powdered sugar
  • 1 teaspoon of vanilla extract

Dry + wet =  perfect pumpkin bread!
Step 1:

Preheat oven to 350°F and spray or butter 9x5x3 inch loaf pan. Sift together the flour, salt, sugar, and baking soda in a large bowl.

Step 2:

Mix the pumpkin, oil, eggs, water, and spices together in a mixer, then combine with the dry ingredients. Add dry ingredients in three parts to ensure it mixes well. 

Ready for the oven!
Step 3:

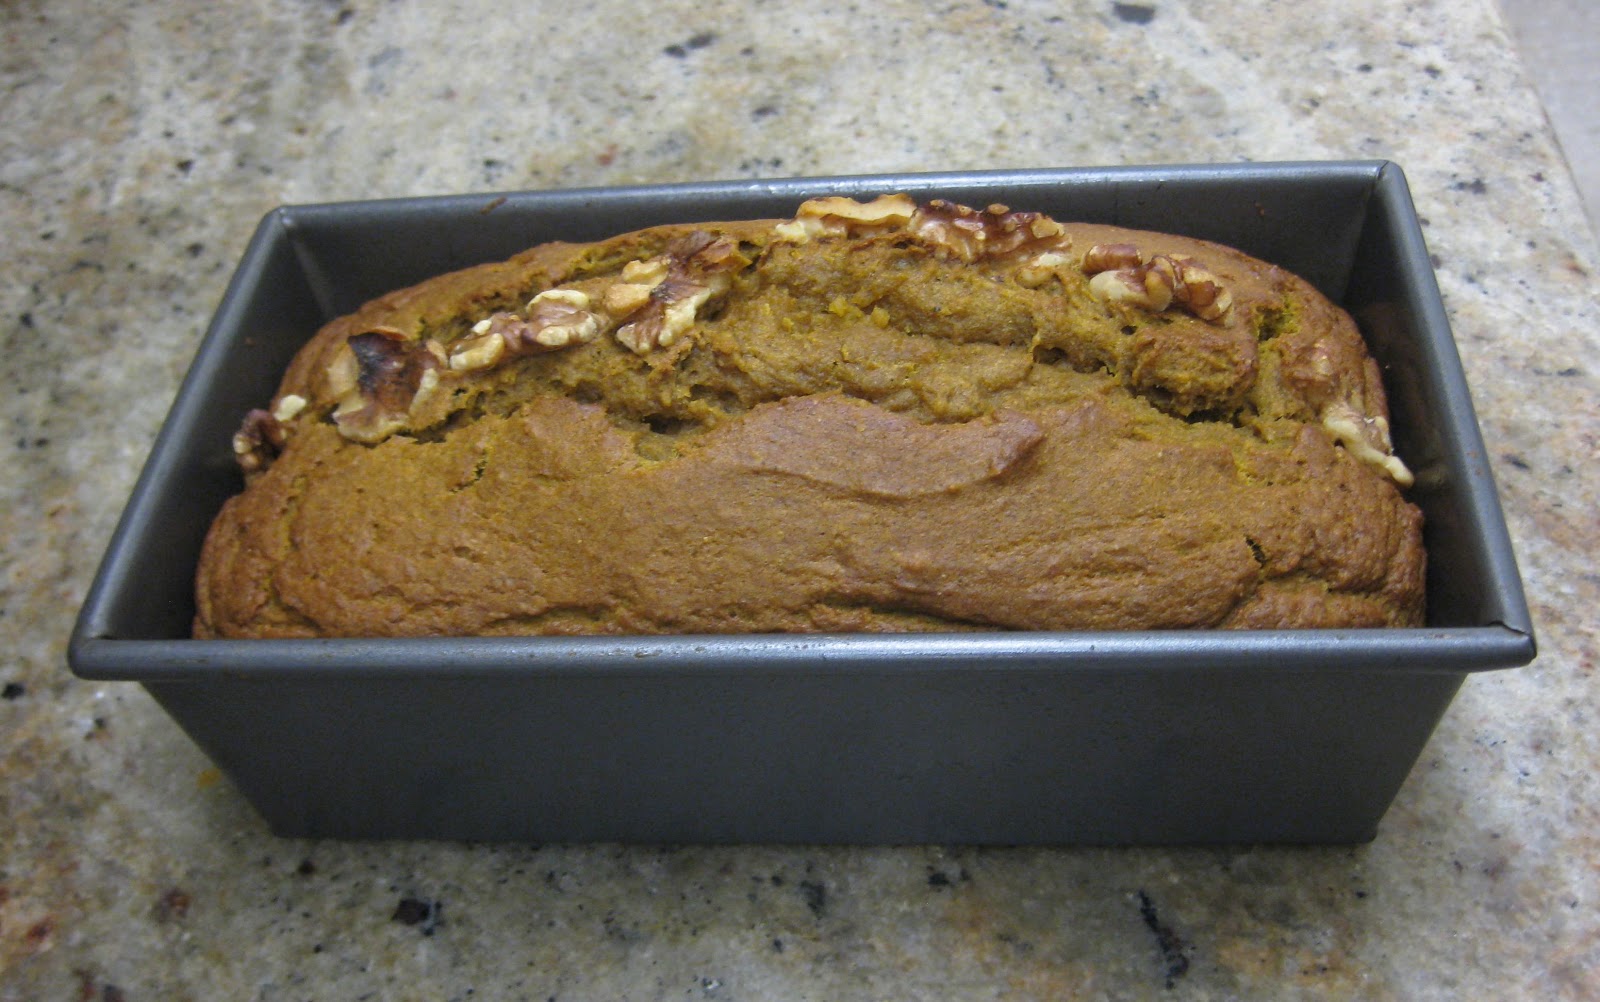
Pour batter into loaf pan. Add walnuts to top of batter (optional). Bake 50-60 minutes until a knife poked in the very center of the loaf comes out clean. Turn out of the pan and let cool on a rack.

Yum!
Step 4 (bonus!):

To make cream cheese frosting, mix the butter and cream cheese together. Add the vanilla extract and mix. Add the powdered sugar until it tastes perfect! Spread on top of cooled pumpkin bread and serve.


If you're an Etsy seller in the San Francisco Bay Area, contact Katy or Steph about joining SFEtsy!

Tuesday, October 2, 2012

Tuestorials: Fabric Pumpkins

Everyone has their thing, their obsession, their “jam” as I like to say. In terms of crafts, my jam is fabric pumpkins. This (almost) no-sew project gets me in a festive Fall mood and, for the last two years, I’ve hosted craft parties around it to show friends how to make them. My love for them could not be contained within me, it had to be shared. Today, I present my jam and I hope it gets you as excited about Fall as I am!


When the clock strikes midnight, they will turn into a pumpkin!
Materials
  • stuffing (can also use many plastic bags)
  • scrap fabric in fall colors and patterns (fabric measurements depending on the size you want     your pumpkin. Almost any size well work so use what you got!)
  • small scrap fabric, ribbon, glitter, etc. for establishments
  • twine or thick string
  • scissors
  • fabric glue or hot glue gun
  • rubber band
Any old fabric about to be turned into Fall magic
Step 1:

For a standard sized pumpkin, take a piece of 10" by 7" fabric and sew the two ends together (do not cut in two separate pieces). It should look like a sleeve when done. In fact, you can use a sleeve of an old sweater or flannel shirt for this project. The possibilities are endless. For a no-sew option, you can glue the two ends together. Wait for glue to dry to proceed to the next step.


Inside Out
Right Side or Pumpkin Bottom!
Step 2:

Turn fabric inside out and tie a rubber band to one end. Turn fabric right side and the bottom will look like the bottom of a pumpkin (one step closer!). Stuff slowly, careful to not undo the rubber band.


Stuffed and ready to be tied together!
Step 3:

Once your pumpkin has taken shape, take the twine and wrap the top, leaving extra material on top. This will create your pumpkin stem. Tie the “stem” a couple of times (to ensure your pumpkin is closed tightly) and loop around the sides of your pumpkin (circle around stem then down one side, then back up again to the stem). This will help form your pumpkin’s shape and look like the seams of a standard pumpkin. Once you are done with the sides, loop around the extra top fabric several more times to finish the stem. Cut and tie off twine.


Bling, Bling
Step 4:

Now for the sparkle and shine! Take your small pieces of scrap fabric and add leaves, stem curls, anything festive to your pumpkin! Any type of fabric glue or a hot glue gun will work.


Ready to party until the Holidays!

If you're an Etsy seller in the San Francisco Bay Area, contact Katy or Steph about joining SFEtsy!

Tuesday, September 18, 2012

Tuestorials: Gold Bootie Redo

Ankle boots or booties are everywhere now. I have a small collection I wear year-round that is starting to show it's use. On my boots, the heels are the first to go. Rather than throw out that pair, I decided to give it some love and add some fun too. If you do not have a pair of booties laying around, you can easily find a cheap pair at Payless Shoes or your local Goodwill.


Not Many Materials Needed to Create Your New Look!
Materials
  • Old ankle boots or booties
  • Gold paint (spray paint works too!)
  • Brush
  • Painter's tape
  • Newspaper or paper bag (for protection)

Booties Needing an Update!
Step 1:

Select boots with a defined heel and take note of the material. The boots I selected are made of faux suede and I used a fast dry enamel paint (in a "gold leaf" shade).

It's Ready!
Step 2:

Clean the area you want to paint and apply painter’s tape around it. On my boot, I applied painter's tape around the top of the heel.

Step 3:

Apply paint. For gold paint on black boots, apply two coats. Dry in-between for best results.

New Dancing Shoes!
Step 4:

After the paint dries, remove painter's tape and admire your work! Your new shoes are now ready to party. Adding glitter or stripes to the heels are good remix ideas too. Be inspired by your craft closet to create a new look!


If you're an Etsy seller in the San Francisco Bay Area, contact Katy or Steph about joining SFEtsy!

Tuesday, September 4, 2012

Tuestorials: Geometric Elbow Patch

Ladies and gentlemen, Fall is now in full swing! Back to school time, pumpkins, dusting off the old go-to soup recipes...I love it all. But at the top of my list of things to love about Fall is fashion. Especially here in the Bay Area where you can wear a sweater year-round, the new Fall trends offer something exciting to clothes we can almost always wear. This is why I will be dedicating all of September’s Tuesday Tutorials to fashion updates!

While the elbow patch trend is not brand new this year, it is more popular than ever and something I’ve been seeing in almost every chain store. Today’s tutorial will show you how to create this look using something other than standard oval patch to take your old sweater to the next level.

Materials
  • old shirt, sweater or blazer
  • suede, felt or thicker textured material for patch
  • scissors
  • pen
  • thick paper to use as stencil
  • needle and thread
Materials gathered

Step 1:

I’ve selected an old striped shirt that could use an update. Put on your selected garment and use a pen to mark where the center of your elbow hits.
"X" marks the spot!
Step 2:

Select a shape for your elbow patch. Trace your shape on thick paper and cut out your stencil. Use this stencil on the back of your fabric and cut out two pieces.

Rather than the standard oval, I went with a pear shape. Geometric shapes are a fun, accessory detail to add and a little unexpected. Hexagons, longer ovals, or hearts would also be great choices!

Stencil is ready
Step 3:

Take your needle and thread, and sew on your patches. Use your mark as the center of where your patches will be sewn on. I used a running stitch to sew on quickly, but almost any stitch will work!


Step 4:

Wear and enjoy! Everytime you receive a compliment, you can let them know that you made it.

Fall Fashion Ready


If you're an Etsy seller in the San Francisco Bay Area, contact Katy or Steph about joining SFEtsy!
Related Posts Plugin for WordPress, Blogger...