Showing posts with label creativity. Show all posts

Monday, October 13, 2014

Immerse Yourself in the Season

Fall marks a unique time of the year when so much is beginning to change. As opposed to spring which revives us from the sleep of winter with the blossoms of summer's fruits, fall comes silencing the flirty abundance, leaving us in an awkward relationship with the introverted and coy squash, roots and tubers. There is beauty here among the earthy tones and flavors. Seeing it is just a matter of immersing ourselves in the season.


When I was younger, a chef I worked for took me under his wing, offering his wisdom. Wisdom shown in bouts of rage. He really did try to impart so much knowledge. He was always yelling at me. As the season's change approached, I would prepare to rewrite my portion of the menu to the tune of him marching around the kitchen before each shift demanding, "grind yourselves in the season!" At a time when seasonal, organic and farm to table fare was still climbing out of the dark ages, he was guiding me into the natural gifts of the seasons. It took me some time to become fully open to this simple concept, which would ultimately set me free. Immerse yourself in the season.

As a chef who currently works with small farmers and farmer's markets it is quite simple for me to follow the seasons as I create my preserves and ferments. Hey, if it's not coming out of the ground or off of a tree I can't use it. However, with my other creative pursuits I still use the seasons to get an inspirational charge. "Art imitating life" is not a new concept and I know many of you out there draw upon your experiences and surroundings to feed your creativity. This is a great process but one which we can overlook.

Pomegranates bursting when ripe remind me of hidden jewels.
As with finding inspiration for being creative during the colder and sometimes drab months we call the fall and winter, as a shop owner it is imperative to find the motivation and follow the natural trends of the changes in seasons to update our crafts, listings, and possibly, shop. Changing tags to encourage search results for the season and upcoming holidays is a good idea, as is placing items suitable for the time of year in your 'featured items' slot.

The holidays will begin to fill up the space in-between the autumn days, bringing about events, plans, commitments, and family gatherings, adding much joy along with stress. The demand of orders for your items will hopefully begin to increase as well, leaving you with a lot to accomplish: baste turkey, pack orders, mash rutabaga, pinch nose, mail packages, chat with aunt Marge. Still many of you will also be taking your shops and wares out to various locations in the Bay Area, ever increasing the demand on your time and energy. In the midst of all of the festive chaos, DO NOT let all of the hustle and bustle of the holidays interfere with the opportunity for you to get out into the world and experience what the season has to show you.

Natural patinas, color contrasts and textures. Autumn brings
so much inspiration to be enjoyed.

Submitted by Klee Wiles-Pearson of Entropy the Shop.


If you're an Etsy seller in the San Francisco Bay Area, visit Our Team Page about joining SFEtsy!

Friday, June 1, 2012

#SFEtsy June 5th - Staying Inspired


'Staying Inspired' is by far the most popular topic as voted for on the topic suggestion sheet so we're going to cover it this week!

This should be a topic that everyone feels able to contribute to so Tuesday's chat will be all about sharing the tips and strategies we have each developed..

We'll be discussing how to recognise when you are stuck in a rut and what to do to get re-inspired, both in an ideal world and also if you are under time pressure. We'll talk about ways to use people and places to help inspire you and also look at strategies to keep your creativity high so you never need to drag yourself out of that rut.

If you're an Etsy seller in the San Francisco Bay Area, contact Katy or Steph about joining SFEtsy!

Wednesday, May 23, 2012

SF Etsy Member Hello Cupcake Interviews Jonathan Adler


We are delighted to present a guest post from SF Etsy team member Stacy of Hello Cupcake -- who recently interviewed Jonathan Adler! It was thanks in part to the support of the SF Etsy team that Stacy was able to gain enough votes to win this opportunity. Read on to learn more about her adventures!
 
"When I sat down for lunch with the public relations representative before my interview, he asked me "How did you do it?  How did you get so many votes".  A few weeks back, I had sent an email to everyone I knew.  I had reached out to the entire SF Etsy Team. I had blogged, tweeted, Facebook and chatted up everyone I could to let them know that I was in the running to meet and interview designer Jonathan Adler in New York City and that I needed their help to get the most votes to win.  I won.  I won in excess of over 1000 votes to the person in second place.  Sometimes it takes a community like SF Etsy to help get you where you need to be.

I'm recently back from my trip to NYC where I was able to meet and interview Jonathan Adler in his SoHo loft.  In choosing what to ask the known designer with stores across the US, his third book in production and having collaborated with some big name companies I wanted my questions to be relevant to people who read my blog and for people who are looking to make a creative leap.  Having an Etsy shop (Hello Cupcake) and recently quitting my full time job at a San Francisco nonprofit as public relations manager to start a boutique pr agency (Hello Cupcake Public Relations) I wanted to talk about fears, failures and successes in the pursuit of following ones creative passions.

To read the interview and see additional images from Jonathan Adler’s studio please visit the Hello Cupcake Blog!"


If you're an Etsy seller in the San Francisco Bay Area, contact Katy or Steph about joining SFEtsy!

Tuesday, September 6, 2011

Natural Yarn Dyeing Tuestorial - Part Two


Part Two is here! Paaaarty!
For part one, please click here.

Last week, we left off just after I had foraged for materials with my family and had placed the wildflowers in a large stock pot.
Here’s what happened next.

4 - Preparing the Dye/Extracting Color from Materials
At this point, you want to submerge your materials in water and bring them up to temperature and hold it there for a while ensure that all of the available dye has been extracted from your materials.

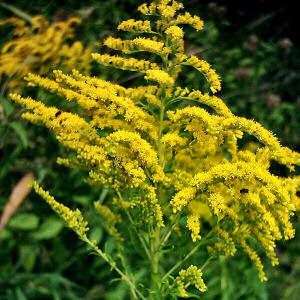
Each material is different...so be sure to follow your recipe. When we used the Goldenrod flowers, once we extracted the color, there was no more to suck out of the poor flowers... but, later, when we used Sagebrush, the recipe did say that we could put the stems back into the water batch to take out more pigment.
In my research, I did find a good general guide for extracting color from plant materials.

- FOR FLOWERS - boil 20 minutes; strain off the water to make the dye bath.
- FOR BARKS, ROOTS, DYEWOODS - soak overnight, boil 1/2 hour, pour off and save the extract (this is the dye solution), add more water and boil again. Do this boiling and saving three times to make the dye bath. -or more times, as long as dye continues to extract.


(image: the goldenrod is inside it’s pot and ready for a steaming hot-spring experience!)


After you've extracted the color from your plant material, you want to discard or set aside your plant materials that you boiled. Use tongs at first to grab the larger pieces of plant materials and then use a hand-held strainer to grab the rest of the little bits of leftovers. Certain plant materials can be boiled again, as I mentioned, over and over again... But in most cases, you want to just put your extras straight into the compost. See... Even if you boil it over and over to extract more color again – your plant only has a limited amount of pigment to extract – so the first extraction will always be the most pure in the color and pigment.


After you don’t see anything but colored water...your dye is ready to use. YAY!!
At this point, You can set it aside if you're not ready to use your dye. However, just like most things, your dye WILL SPOIL...so you'll want to either refrigerate it or use it right away so that you're sure that all your hard work obtaining this isn't lost.

5 - Dyeing the Yarn

Basic Idea – you can just put your yarn into the bath and then wait (based on your recipe)... You want to wait for as long as it would take for the dye to truly soak into your yarn fully... This will keep the color from fading quickly and it will also ensure that you get the most color into your yarn as you can. Therefore, a 10 minute soak likely won’t work... You’ll want to keep the dye hot (on the stove) and expect to keep your yarn in there for at least a half hour.

More complex ideas and techniques:
Before I began with my yarn, I did read this book - Hand Dyeing Yarn and Fleece: Custom-Color Your Favorite Fibers with Dip-Dyeing, Hand-Painting, Tie-Dyeing, and Other Creative Techniques... It was a great resource for inspiration. I learned that if I only put part of the yarn into the bath, than my yarn will take some of the color and wick into the rest of the yarn. I obtained a gradient look to my yarn this way and I know that when I make something with my yarn later down the line, there will be a variation in colors. You can dip your yarn later down the line in another dye bath as well if you’d like to get a rainbow effect if you’d like as well.

The hardest part of this process for me was that you had to sit and wait. No swirling the yarn around in the dye. You have to be patient and know that the yarn will take the color without your assistance.


(image: this was a Madder Dye Bath - it looks a little like guts here)

6 - Finishing Touches & Tips

When you’re ready to take your yarn out of the bath... Wear protective gloves to keep your hands away from the dye and also away from the hot water. Some recipes ask for you to hang the yarn, then rinse the yarn and hang it again... Others just ask you hang it and let it dry. Either way...you’ll want to make sure you have a place to hang your yarn once it’s complete and you’re not going to be dripping dye all over your bathroom...
We used a large plastic tub to transport the yarn from the kitchen to the clothesline.

TIPS:
Oh man do I have a lot of tips and little factoids about this... Here are just some that I can think of at this moment...

BE PATIENT – this process takes a full day... Some mordents may take a FEW days... Finding materials takes time... Boiling them takes time. I for sure could see how some Etsy sellers will sell their hand-dyed yarn for upwards of $100 because the more colors you put into the work, and the more materials you have to find... It’s just seriously time consuming and it’s a practice of patience.

BE CREATIVE – I guess, for this crowd, this won’t be the hardest part... But when you’re doing this...you want to think about the end product... What will you use this yarn for...what types of colors do you need to obtain...and what type of effect to you want at the end of the process?

Another creative thing that my mom did was she kept all of the paper wrappers that came with the yarn so that the yarn’s original information could be reattached to the skein once we finished up and everything was dry. Then, she would write on there how that yarn was made and with what.

KNOWLEDGE IS POWER – Did you know that you can’t find blues in the USofA?! Oh dear... My heart sank that I would not be able to forage for a blue color... Mostly, in the US you can pick and find greens, browns and yellows. Reds and some purple shades can be found in berries, but the color will fade more quickly than other shades and it’s messier for sure to go into that color pallet. All the colors available to us (if you were to forage for your own) are SUPER pretty... But not blue. After I left Montana, my mom did do an “exotic” dye bath and used an African pigment that she had bought online. And... To the same note – make sure to TAKE NOTES! What the book says will give you a good idea of what might happen... But what actually happens might be something totally different. So keep track so that you can come back to it.

ONLINE is your resource! You can pretty much find anything you need for this online... You really don’t’ need to go hiking in the woods to do this. I do think that your end product would be worth more if you could say that you actually hand-picked the plants that created the vibrant color – but if you’re looking to just do a couple batches of this at home here in the Bay Area... Go ahead and just look and see what you can find online. There are a TON of resources, recipes and also supplies out there for the taking.

RESEARCH FIRST – Since each plant material, yarn and mordant call for different considerations to be made... Be sure you fully prepare yourself before you get yourself into this project. Also, even after you dye your yarn one time...you can go ahead and do an after-bath of mordant that will change the color of your yarn...many books will give you a full break down of what will happen for each recipe direction you chose.


READING MATERIALS:

Harvesting Color, by Rebecca Burgess (she’s from San Geronimo); Copyright 2011, published by Artisan, a Division of Workman Publishing Company
 
“Global Color: A Survey of Natural Dyeing” by Kristine L. Vejar; Copyright 2011 – Kristine is the owner of A Verb for Keeping Warm in Oakland and she wrote this pamphlet
 
A Dyer’s Garden, From Plant to Pot Growing Dyes for Natural Fibers by Rita Buchanan; Copyright 1995, published by Interweave Press
 
Dyes from Plants, by Seonaid Robertson; Copyright 1973; published by Van Nostrand Reinhold Company
 
Create your own Natural Dyes by Kathleen Schultz; Copyright1975, published by Sterling Publishing Company
 
Dye Plants and Dyeing – a handbook a special printing of the Brooklyn Botanic Garden Record Pants & Garden, Vol 20, No. 3, Eleventh printing, July 1976
 
 
RESULTS!!!
The following photos are meant to inspire you! Here are some of what I did while I was in Montana...and some of what my mom did after I left... She’s gotten REALLY into it....as you can see. I think this kinda of thing is very addicting – so watch out! :)


(image: Golden Rod and Sage dyed yarn on the clothesline)


(image: Sage dye. Copper, tin, alum mordants. Iron afterbath for darker colors.)


(image: Sage and logwood dyes. The Logwood is the African dye)


If you're an Etsy seller in the San Francisco Bay Area, contact Jen from Mama's Magic Studio about joining SFEtsy!

Tuesday, August 30, 2011

Natural Yarn Dyeing Tuestorial - Part One


As I mentioned in my Button Blog Post a couple weeks ago... my family is a crazy crafty bunch - I wouldn't have it any other way. And you'd think I would have learned my lesson with the button "situation" but I sparked another craft project that's quickly becoming a huge family project. Like Whoa.

Just over 2 months ago I was at Green Apple (my all time favorite SF book store) searching through the craft books. To be truthful, I need another craft book like I need a hole in my head, but I looked anyway and ended up picking up a book called Harvesting Color: How to Find Plants and Make Natural Dyes. The imagery is captivating in this book. I walked home while thumbing through this gorgeous book...only slightly tripped on the sidewalk a couple of times...no big deal.


I had my nose in the book the rest of that evening. Each chapter is organized by season...as in the season best to forage for that natural wild flower/plant. And each plant has AMAZING photos of the yarn after dying, the plants, a recipe for each plant dye and an illustrated chart which shows exactly where this plant might be located within the USofA.

I had been planning a road trip to Montana with my boyfriend at the time and I thought...self, let's go walk in the middle of the woods and pick up some supplies.

Just pick up some Supplies?! Not really as easy as that... but at the time I was just really excited about the concept that I could find natural dye on my own, and just POOF, dye something.

Really the process ended up being much more complicated than that. But for all of the work...Natural Hand Dying is possibly one of the most rewarding things you'll do.

Knowing that I couldn't do this on my own...I very "casually" gave my mom my book that I found.... "Hey Mom...thought you'd like this... maybe we can go pick some plants while we're in Montana this summer". I handed the book to her with pages already marked of all things found in Nevada, Idaho and Montana since that's where our trip would be taking us.

The next thing I knew, my mom had called me to say that she'd been to her favorite store in Oakland to obtain the first part of the materials we needed. The game was afoot and before I knew it we had all that we needed to dye yarn on our vacation. Yes, a vacation isn't really a vacation in my family unless we have a serious family project.

BASIC PROCESS:
1 - Gather Materials Needed
2 - Prepare the Yarn for Dying
3 - Forage for Supplies
(Okay, you could do this with step #1, but I separated it out into it's own section)
4 - Preparing the Dye/Extracting Color from Materials
5 - Dyeing the Yarn
6 - Finishing Touches & Tips


STEP ONE: Gathering Materials Needed
Yarn
Strainer (small one (around 6" across) will work well for this)
A Wooden Spoon
Measuring Utensils, like cups and spoons
Small Kitchen Scale
Rubber Gloves
Thermometer
Plant Materials (foraged)
Water
At least 2 Large Stainless Steal Stock Pots - and I mean LARGE

STEP TWO: Preparing your Yarn for Dying


First, you gotta remove the oil from the fiber. For 1 pound of raw wool: fill 3-4 gallons of water in a pot with detergent (like Dawn). Put the wool in and slowly simmer for 45 minutes. After cooling your yarn, be sure to rinse it as well. This will help to make sure you have no contaminants in your yarn.

In order to bring the most life out of the color you'll be dying your yarn, you should likely consider using a Mordant first on your yarn to make sure the yarn takes the color. Using one of your large stock pots (marking it as your Mordant Pot so you don't cross contaminate later), you want to fully submerge and soak your yarn for the time stated within the recipe you've chosen. Mordants are needed to set the color when using natural dyes. Different mordants will give different results.

Alum: (Aluminum Potassium Sulfate)
This is the most widely used mordant. Be careful not to use too much with wool, otherwise you will get a sticky feeling that doesn't come out.
Solution is 4 oz. Alum to 1 oz. cream of tartar.

Consulting a book like the book I mentioned above will teach you the differences between the multiple mordants that you can chose. Your local yarn supply store should carry some mordant or be able to guide you in the right direction.

STEP THREE - Forage for Supplies

What's funny is that when I first thought of doing this...I thought this was the bulk of what you would be doing...and in reality, preparing your yarn takes MUCH longer than the actual foraging. OK...so maybe I got lucky. My cabin sits in a mountain by a lake...we had 3 different types of plants that were running a muck up in the mountains of Montana. If you're a city girl...you might want to consider a short road trip for some of the materials you'll need for this...or you can get some natural dye from your local yarn shop and skip this step all together.

This was by far my favorite part of the process. After reading and practically drooling over that Natural Yarn Dye Book...we had already found that there was lots of Goldenrod and Sage to dye from.

By the time I got up to Montana with my boyfriend, my parents had already found a field about a mile away from our cabin that was speckled with goldenrod wild flowers. The recipe called for basically a whole stock pot full of flowers... knowing that we wanted to do a couple rounds of dye with this plant material... each of us gathered around half a bag full of flowers. Additionally...we did keep in mind that it would be better for the plant if we didn't snip off all of the flowers so that we weren't hurting the environment around us.


TO BE CONTINUED...
I hope I left you in suspense!
Because of the complexity of this project, I have written this blog entry in two parts. Part Two will come next Tuesday the 6th of September and will consist of steps 4-6... stay tuned for more amazing results!


If you're an Etsy seller in the San Francisco Bay Area, contact Jen from Mama's Magic Studio about joining SFEtsy!

Tuesday, July 26, 2011

Tuestorial - BOMB Stress AWAY!


Once a week I take 45 minutes to exit the stress of my week...
I set myself up a soothing bath...grab the latest DIY magazine and (most times) bring a cup of tea, or a beer, or a glass of wine in the bathroom with me. (or all three...ha ha)
It's my once a week ritual that has been helping to keep my stress from eating up my creative soul.

This all started when I went to Lush with my Mom a while back...but at over $5 per bath bomb or bubble bath...I just couldn't keep up with the cost of my baths. So...I decided to learn how to make my own aromatherapy baths. I also wanted to make something that was good for the environment...it's nice to know that what goes down the drain after my bath won't hurt the environment.

Making them is SUPER easy...so easy, that Sunday night I made a half dozen of these with my boyfriend's daughter who is 6 years old. She is very excited about taking baths this week. I guess if your kids hate taking baths - you could try to do this to get them a little more pumped about gettin' in the tub.

Finding the ingredients in San Francisco...surprisingly NOT easy (for me) so I did write down some tips for finding all of the bits and pieces here in San Francisco...which hopefully will help you out wherever you are.

Recipe:
1 cup Baking Soda (This is what will make it fizzy)
1/2 cup Citric acid
1/2 cup Corn Starch
2 Tablespoons Witch Hazel
3/4 tablespoon water
2 teaspoons Essential oils
2 Tablespoons Olive Oil
3 drops food coloring (optional)


Here's how I did it.
Put all the dry ingredients in one medium size bowl
put all the wet ingredients in a smaller bowl
combine the two once measured...

put your mixture into molds. Fill the mold all the way up and then press down firmly to make sure the mixture is solid and will not crumble once dry.

keep your molds out of reach of yourself for a few days...then release from the molds and put into an air tight container for use later!

To use: fill up your bath with water... drop in a few bombs and watch them fizz away all the stress of your day.

TIPS!

- Finding the molds shouldn't be an issue...but if you want something Fun... you can make a bunch of mini bombs in those crazy rubber ice-cube molds that come in every shape you'd ever want.

- Pay attention to the details of the recipe: Normally, I'm the lazy kind of DIYer and I usually just dump everything in all at the same time...but since this recipe really is combining chemicals together...I take the separation of dry and wet a lot more seriously. I don't want to fizzle out my fizz by putting the wet ingredients in too quickly.

- What if your bombs never set in the molds and they crumble all over the place? NO worries! Thing is...you could just put all the good stuff you made above and just put it all in an air tight container if you wanted pretty much...spooning it into your bath instead of pressing it into a mold will work just lovely as well. Don't you worry...you'll be fine. However, if you're gifting these...perfecting the molds is a plus. I bought some cloth bags for cheap which make great companions to the bombs.

- Finding Citric Acid - the hardest to find. This was the hardest thing to find for me. the recipe I had found said that you could get this at any craft store or drug store. no...no you can't. But then someone said to me that citric acid is in foods, so I should try a food supply place. The light bulb went off. I ended up purchasing it at San Francisco Brewcraft. I got 5 pounds of it and when I got home I felt so silly since you only need 1/2 a cup. ha! If anyone needs any...I have some extra to go around, clearly.

- Essential Oils and you! A while back I found this gem of a place called The San Francisco Herb company. You know all those bulk teas you see in stores? Yeah...they pretty much all come from here. So knock out the middle man and check out this place. I got my essential oils from here because if you're a business, they GIVE YOU A DISCOUNT! Hollar at my money saving techniques...what what! ha ha... but really...they have pretty much all of the oils you'd want to see there since they also have pretty much anything you'd want to put in a killer potpourri. For just under $20 I got myself some vanilla, peony, jasmine, honeysuckle and spearmint. I have been able to use my oils many MANY times since then...a little goes a long way.


If you're an Etsy seller in the San Francisco Bay Area, contact Jen from Mama's Magic Studio about joining SFEtsy!

Thursday, July 14, 2011

It's Ok To Not Want To

Last week's post about giving yourself some time away from the chaos and putting things in perspective was inspired by my personal state of feeling overwhelmed by the list of things I want to have done and general lack of motivation to do them. A couple days in Tahoe with no computer and no phone weren't enough for the motivation to kick back in. In fact I came back with a mild tension headache that hasn't left me for 5 days now.

The oddest part about my current state is that I'm not lacking inspiration. We've got some amazing projects underway and I'm getting new ideas about them all the time. I've got two new clients I'm working with and I keep seeing the light bulbs go off when we meet. I even started listening the audio version of Made To Stick by Chip and Dan Heath and my own light bulbs are sparking up all over the place. The thing is my brain is in overdrive, but I just can't seem to act on any of the inspiration. I feel unfocused and totally lacking in energy.

I'm not writing this post because I suddenly found the cure the blasé feeling, I'm writing to remind you that we all feel it. It's part of the cycle of creativity and a part of being a creative business owner. However what I will tell you is the advice I would give any of my clients... It's ok, it will pass.

When you feel any of the feelings I mentioned above or others, no motivation, no inspiration, lack of focus, or even anxious overwhelm, listen to you body. Sit with the feeling and let your mind tell you what it needs. You may want to stare into space letting all the thoughts swirl around, you may want to be distracted by a movie or book to quiet your brain, you may simply want to take a nap or hang out with a friend. Be kind and let yourself. Fighting it doesn't get you anywhere but more frustrated with how things aren't as you'd like them.

So give in and go nap in the sun or watch a few hours of hoarders and most importantly don't feel guilty. Your mind and body will repay you by bouncing back with a renewed spark after it gets the chance to cycle through and recover.

What do you crave on those hardest of days to motivate?


I encourage comments directly to this post, but also feel free to email me directly with questions, reactions, struggles, etc. genevieve@lightboxsf.com


If you're an Etsy seller in the San Francisco Bay Area, contact Jen from Mama's Magic Studio about joining SFEtsy!

Saturday, June 25, 2011

Inspired by Handmade - Pack it up, pack it in

This weekend I'm on a short trip to see family in Southern Idaho.
Although this trip is short...a summer trip to Idaho is something I've grown fond of. Born in Blackfoot, ID but raised in The Bay (and having a summer cabin in Montana)...road trips and airplane travel is part of my summer vacation each year....traveling is where I learned how to crochet...it's where I learned how to cross-stitch, I drew in my journals and it's where I found the most pleasure listening to Operation IV and Rancid as loud as I could (without my Dad hearing my music).

Packing up my things I thought of our Etsy team and how many of our members have such great items that are perfect for a road trip or a couple of hours on a plane with nothing else to do but waste a bit of time.

So this week, I'm in inspired by things you can bring with you while you travel. Functional pieces...things that I could use each year on my voyage to Montana and Idaho. Some of these items are from team members and some are just from our local community. I think you'll be inspired to get on the road to new adventures with these great finds!


1. bring a hat...buy something small that you can stuff into a small corner of your bag... this Cashmere Wool blend Handmade Cycling Cap by alloneword is a great travel companion! it will keep some of the sun out of your eyes while also keeping your head warm. The nights up in Montana can get really cool and I could also see myself using this on a morning hike around the lake.

2. a pillow is a must have! But not a huge pillow...come on...no need to pack yourself a large pillow... if you're on a plane, having a pillow to rest your head on while you take a little snooze is a luxury... have one that is totally AWESOME like this Day of the Dead pillow from MiVidaCreations just makes you look like that totally awesome traveler that you are.

3. Keep a log! I like to make Sketch Diaries of my trips. It's a way of being in the moment for me and also a way to remember how many great memories I have without being tied down with a camera in hand. punkrawkpurl makes some great little moleskin journals that are perfect for taking with you on a vacation! She's at the Hecho Local Event this Sunday...so save on some shipping and visit her if you have time.

4. pack an extra bag! I now what you're thinking...an extra bag? More stuff?! But seriously...putting a small tote into your suitcase will give you some flexibility on the road. What if you wanted to stop by that fruit stand you saw a mile back? All you'd have to do is have a tote like this one from jenspillydesigns and you're good to go! Not to mention, if you're anything like me...I always end up with too many things on the trip back to fit into my suitcase.

5. Pack the First Aid kit! Okay...so maybe you dont' need one of these if you're flying...but how great would it be to have one of these handy when on a road trip? I love that this particular one by ReCultivation is vintage. Seriously, I'm one of those people who gets headaches from too much sun and also burns easily...having some aspirin, aloe and sunscreen by me on a road trip is a must! (can you tell I'm Irish? ha!)

6. A gift for the hostess. Packing a small gift for the hostess will make your vacation all that much sweeter! I like giving handmade soaps or scrubs to my hostesses. This one is just lovely to look at and doesn't break the bank! Plus, this soap by ettaandbillie is Rosemary Lemon... Mmmmmm... it'll make the clothes you pack it by smell that much sweeter!

7. Kill the boredom! I was pretty excited to see that Even Howard (nadene) had some great little DIY Kits on her Etsy. Yay! Her things are so beautiful and now I can work on killin' the time with something creative to keep my hands and mind busy.

8. Rock ON with ya bad self! Don't forget your iPod for some tunes along the way... when we drive out through Nevada, it's really VERY important to bring something to break up the trip and the radio stations are pretty much not happenin'. I love the iPod cases that EvelynX makes... she even has some that are made to order! Maybe you can get it personalized also so everyone knows how prepared you are for some rockin' out!! :)

What types of activities did your family do while you went on road trips as a kid? What traditions do you now have with your kids? I'm curious how many of us learned some of our go-to crafts while we sat behind our parents at the wheel.


If you're an Etsy seller in the San Francisco Bay Area, contact Jen from Mama's Magic Studio about joining SFEtsy!

Thursday, December 2, 2010

Dear Miss Mignonette - The Price is Right

Miss Mignonette - A Savvy Coquette

Dear Miss Mignonette:
I've been on Etsy for 6 months now, and I've barely had any sales. I think that my work is really cute and well-made, and I don't understand why all of my sales have been to family members and friends. I've looked at other Etsy sellers who have tons of sales, and my work is much cheaper.  What gives?

Dear Miss Mignonette:
Last week I had a booth at my first craft fair. It was really frustrating - I sat all day and hardly had any sales! I did have tons of people coming over to my booth and talking to me, but hardly anyone bought!  I took a break and walked around and my prices were much lower than other sellers, and they had people lining up to buy!  What am I doing wrong?

It happens every time - I go to a craft fair and an amazing booth catches my eye.  Here is an artist who has it all: an incredible product, a catchy name, and a booth display that will knock your socks off. I want one of everything - and the super-low prices mean that I can afford it. Yet the prices also put me off, and more often than not I leave empty-handed. You've probably done this too, or had it happen to you.
 I know it sounds counterintuitive, but trust me: your felt mustache on a stick/ narwhal wallet/ Gocco print doesn't cost enough. It is so cheap that consumers are suspicious of it on a subconscious level.

As a former buyer and a craft fair veteran, I've met my share of crafters who are clueless about the worth of their work, or just don't understand its value. A few months ago a lovely, super-talented crafter crossed my path and had the unfortunate luck to tell me that she was charging around $3 an hour for work that, if it were sold at a specialty store, would retail for $200, and even worse, her sales were stagnant. I gave her such an earful that she was too terrified not to take my advice, and now her business is booming.  I won't chalk it all up to re-pricing her work, but once she made it clear that she was taking her business seriously on all levels, the buying public had no choice but to take notice and give her the recognition she deserves.

In retail there is a little something called 'perceived value'; we know that when we walk into a truly amazing store, we are paying for ambiance and  overhead, and that's before we even get to the product,  while stepping into a no-frills discount store means that we don't expect much, therefore we don't expect the products to cost much, or last long, even though they might be high-quality. The same goes for your work.

Let's compare two tee shirts - one from Target, the other from a boutique for a considerably higher price. Both are cute and simple, but  you wouldn't think twice about wearing the less expensive one until you trashed it, while the pricey one would be hand-washed and treasured, right? Think of your work the same way.  The cheaper you treat it, the cheaper it will be treated by the customer.
Let me explain, because I can feel the objections forming:  "I want to sell!  I don't care how much it sells for, I just want it out of my house!  I just want people to have it!  I'm not in it for the money! " Be honest with yourself:  You wouldn't be selling your work if you didn't want to make some money from it. Otherwise, you would give it away and you wouldn't even be reading this. Embrace the fact that you want good money for your art, and you'll be okay with pricing correctly.


The Nitty-Gritty of Pricing
Let's say that you make wire-wrapped jewelry with semi-precious stones, in the shape of signs of the zodiac , and you're getting your materials from a local supplier instead of ordering them online, and you are spending at least three hours per necklace, and by the end of the day your feet hurt from walking all over town to get your materials and you are up to your eyeballs in Virgoes and Capricorns, all in the name of art. That's great.  The bummer is that now you are going to log on to Etsy and try to sell  all of your sterling silver, carpal tunnel-causing, amazingly creative and well-made work for $25. 

How long did it take you to find the materials to make it, and how much did they cost? And then once you found them, how many hours did it take you to actually make the item? And now you're photographing it, writing clever descriptions, listing it on Etsy, and then if it doesn't sell immediately you're going to take it to sell at a craft fair and merchandise it and then sit all day and try to sell it to customers? For $25?
Yikes!

A Numbers Game
If pricing is driving you up a wall, a little time spent with an Excel sheet (or just some lined paper divided into columns) will work wonders in helping you get a clear picture of what your work should cost.

For each new item, open a new sheet in Excel (or find clean lined paper) and create a column marked "cost" , listing all the materials in the item, next to their costs.

1) Materials
Take into account the materials that you had to purchase to make just that item (silver wire, clasp, beads, etc).

Wire-Wrapped Jewelry
COST
Silver Wire     $10
Beads             $4
Silver Clasp   $3

Materials  =    $17

2) Skilled Labor, i.e. how much time did it take to make?
This is a two-part question.
A) Assuming that you work steadily from start to finish of a piece, with no breaks to check your email, walk the dog, log onto perez hilton, or suddenly bake a loaf of bread, how many hours did it take you? 
B) What is the minimum that you are willing to pay yourself?
Picture this: Imagine that you are offered a job selling ice cream.  You have to stand for at least 6 hours a day, ring people up, wear gross latex gloves, and not eat all of your product, and at the end of each day you've only earned $30 before taxes.  You'd quit that job pretty quickly, right? of course!
So make sure that, when you price your items, you aren't paying yourself even less than you could earn by slinging ice cream.
If you are having what i like to call 'crafter's guilt' about paying yourself a fair wage, i find that consulting your state's guidelines for minimum wage are a good guideline.  In California it's $8, but crafting is skilled labor, so if you want to raise your wage,  I say go for it!

Now multiply your answer from A by your answer from B. Awesome!

Time spent = 3 hours
CA Minimum wage = $8
Labor costs = 3x8=$24


3) Now let's think about added costs. 
Are you shipping that item, and do you offer free shipping in your Etsy store?
How long does it take you to list the item?

These little costs add up, but they should be taken into account. For the sake of not twisting your brain into a pretzel, let's say that you do offer free shipping, and that it takes you 30 minutes to photograph, upload, write about, and list an item. If shipping is actually $4.5, you need to account for that in the price of the item, and that 30 minutes that it took to list the item needs to be calculated with the formula that you used in step 2. 

Shipping = $4.5
Listing =  1/2 hr x $9 = $4.5
Added costs= $9

So let's see: For one necklace, materials ($17) + Labor ($24) + Added costs ($9.5) means that your necklace actually costs $50 to make!

Now that you've got a good idea of how much you actually spent to make that necklace, figure out what sort of profit margin you'd like to make (20%, at least, so if your item costs $50 to make, multiply it by 1.2, i.e. $60, or, it you're feeling really punchy, multiply it by 1.5 and charge $75). 
Now you've got an item that is worth putting your name on.

And if all this math is giving you hives, put down the calculator and do the most important (and fun!) step - Research (i.e shopping).
This is something that you should always do when starting a business, but it doesn't mean that you should ever fall out of the habit of checking up on your competition's pricing either. This means not just on Etsy but also in the non-virtual world. See how much similar items cost in boutiques, and department stores that seem like places where your target customer shops, and take detailed notes.

Once you've got all these systems in place, your work will be ready to present to the world. 

What has been your biggest challenge, or solution, when pricing your work?

What guidelines do you use when pricing a new item?

Add your response in the comments below!


If you're an Etsy seller in the San Francisco Bay Area, contact Jen from Mama's Magic Studio about joining SFEtsy!

Wednesday, November 17, 2010

Dear Miss Mignonette - Getting Things DONE

Miss Mignonette - A Savvy Coquette

Note from Jen, SF Etsy Team Captain: I am absolutely delighted to introduce today's post, the first Dear Miss Mignonette column! Dear Miss Mignonette is an advice column, written by SF Etsy's own Kpoene' Kofi-Bruce, owner of Miss Mignonette and Mignonette Craftsulting. (By the way, did you see yesterday's post about this fantastic business and the amazingly generous offer she's made to SF Etsy members? No? Then go read it now then come right back!)

Dear Miss Mignonette will be a Wednesday column, offering insightful answers to solve the problems faced by crafters, artists, and other creative folks. You can ask Miss Mignonette a question for a future column via email.

And, without further ado, here's this week's dilemma!

Dear Miss Mignonette: I have been running my knitting business for three years and have finally gotten successful enough to quit my job and just focus on the business. This is a dream come true - the only problem is that now I can't actually get myself to make anything. I'm in a rut!


One of the biggest things I struggle with as a self-employed crafter is forcing myself to actually make things. With one thing and another, this month has already proven especially challenging (this post, for instance, is four days late), because it seems like the nice weather, the sudden need to start elaborate baking projects and work through my mending basket, and the seductive powers of Hulu have all conspired, along with my oh-so willing to be distracted brain, to keep me from finishing even the simplest of tasks related to my actual business.

This seeming inability to get anything done, combined with the fact that I am missing deadlines, all adds up to one big, bad feeling: I'm a failure, I'm a terrible crafty business owner, and I should just go get a job at a coffee shop because I'm obviously never going to succeed.

PHEW.

That was pretty painful, wasn't it? But for those of us who aren't masters of organization (and I'm the first to admit that I'm not one of 'em), it is easy to spiral out of control like this every time we fail to meet a self-imposed deadline or spend too much time playing around on the Internet.
Naturally, we want our businesses to be sources of creative pleasure that are just parts of the wonderful lives we hope to have - As makers, however, the very thing that brings in the bucks is often the last thing we feel like doing when faced with a sunny day or a particularly messy kitchen (have you ever noticed how, when you have a really big order to fill, your household chore list suddenly becomes strangely compelling?).

Here are a couple of tips that I have gotten from fellow business-owners, my therapist, my wife, and from my years owning a business.

1) Don't let your task list get the better of you.

You know that you have an end result you would like to achieve, say getting 300 necklaces assembled for bazaar bizarre, or knitting 50 hats to send to a store.
To top it all off, Thanksgiving is a couple of weeks away and you are hosting, AND you've volunteered to make the costumes for your kid's star turn as a jar of frankincense in the school Christmas pageant. Yikes!
The idea of hunkering down and actually tending to all this stuff seems so huge that all you want to do is curl up in a ball and watch reruns of House until it's time to make dinner.
Sound familiar? We've all faced times in our life where everything seems so big, and equally important, that it feels impossible to tackle them and we either end up running away or getting everything done and having a mini nervous breakdown. It doesn't have to be this way.

2) The next step is to take a step back and look at what your goals are. Make a list with separate columns for each project, giving yourself enough space to write under each project. Now look at your tasks. Prioritize them based on when they are due, order of difficulty, etc. You may discover that some deadlines you thought were looming become less scary when broken down to their component parts.

Now parcel out the steps needed to get from point a to z of each project. Every time you finish something, cross it off the list. Soon making a list and crossing it off will become rather addictive!

3) Now that you've got the task list, get on it.
Something else that is difficult for us as business owners is keeping ourselves on task. Nobody likes to be micromanaged, least of all by themselves, so treat yourself like a valued employee and establish a rewards system! This might sound silly, but you may even find that one task becomes a reward for another (i.e. the fun of turning your budding thespian into a biblical spice jar, or perfecting your pumpkin pie recipe, can be a reward - and a necessary break - from a task that feels less fun.

Establish a daily schedule so that you have time carved out to work, and balance it with time carved out to play (and also time to clean the house).
Remember those 50 hats you need to deliver? How much time will it take you to finish the hats? Parcel out a chunk of time every day that is only, ONLY for making those hats. Let nothing else interfere with that time. Play around until you find a routine that feels right to you, but by all means make an effort to stick to it. One good way to relieve any potential monotony is to switch up different business tasks from day to day, for instance - Monday is the day you update your blog, Tuesday is the day you add new items to your Etsy page, Wednesday is the day you work on marketing, etc. (this is also a good way to tie in the goals list that you made earlier and start establishing a really good schedule for yourself, complete with weekly tasks).

4) Establish a workspace.
For those of us who don't have studios it can be hard to stay on task when there is an entire house we can distract ourselves with.
This is dangerous because not having an established workspace can subconsciously prevent us from taking our work seriously. Think about an office that you worked in (or still work from) - do you use your desk in that office for anything besides work (and Facebook, of course)? Probably not. Having an orderly, well-organized workspace with all of our necessary tools signals to our brains that our crafting is deserving of serious effort and a clear head.
Take your craft seriously enough to carve out a space in your home that says "this area is for my business ONLY", and soon you'll find that you do your best work in that space.

And don’t beat yourself up if you don't find yourself falling into line immediately, or find yourself letting things fall by the wayside. The more you dwell on the things you didn't accomplish, the crappier you'll feel.

This is where the most important exercise comes in:
Do take time whenever possible to write down a list of all the things that you did get accomplished that day, for instance, though I didn't finish making a dress that has been nearly done for weeks because I was watching Gosford Park for the 20th time instead, I did get a great idea for a detail I want to add to the dress from the movie - see? Research!
I also took the time to see three different friends that I don't get to spend enough time with, and that yummy positive energy will carry over until tomorrow, when I get to sit down and work on my business some more. On my own schedule.

What tips have you found help keep you and your business on track? What obstacles have you faced in staying on task and focusing on your business? Share them in the comments!


If you're an Etsy seller in the San Francisco Bay Area, contact Jen from Mama's Magic Studio about joining SFEtsy!
Related Posts Plugin for WordPress, Blogger...